
Yep, that's right, squares in your jello... Or square jello in the shape you want, or something like that :)

(Drum roll please) Gelatina de cuadritos, that's the name! Basically, it's fun jello made with a bunch of little squares that live happily inside a yummy white jello. Typical in Mexican gatherings of many sorts, they are even sold in diposable plastic cups, ready to go.
While verifying some facts for this post, I learned that it is also prepared in other countries, but it's generally called "mosaique jello." Whatever the name, it's delicious and super pretty! :)
While verifying some facts for this post, I learned that it is also prepared in other countries, but it's generally called "mosaique jello." Whatever the name, it's delicious and super pretty! :)
When we were planning the Christmas party for kids in church, I thought this would be the ideal way of making a jello - it was one of the requests for dessert, so it just had to be made in a special way.
It was thanks to a dear friend that I finally got the best recipe for this dessert. I generally make it in two days, because you need the jello to set completely before making the final thing. It's very easy to make (as long as you remember not to pull a "Yiya" and turn the heat off at the right time), but it does take time. After
an awfully failed trial - and a sort of dark caramel stuck to the pan, I
started playing with it, adding flavors and even tweaking it a bit to get the
consistency I like.
But before we go to the experimental part, here is the original recipe, just as I got it:
INGREDIENTS
4 3 oz. packets of jello (different colors)
1 can of condensed milk
1 oz. of unflavored gelatin
(1 box with 4 packets)
1 tablespoon of vanilla
extract
INSTRUCTIONS
1st day:
Prepare the jello with ¾ of
the water needed. For example, I used jello packages that call for 4 cups of water, but I used only 3. Refrigerate overnight. In these pictures, you'll see only cherry and lime jello, because I made this particular one for the Children's Christmas party at church, but feel free to use the jello colors you like!


2nd day:
Take the jello out of the
containers and cut it in cubes. Put them inside another container. Give
it a little shake so that the colors combine.


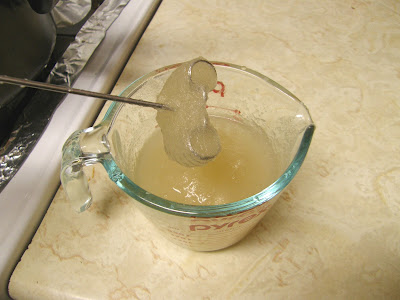
Bring 1 liter of water to a
boil; it's a bit more than a quart. Take a look at my bilingual measuring cup:


Turn the heat off and dissolve the condensed milk in it. Add vanilla extract and stir.


Turn the heat off and dissolve the condensed milk in it. Add vanilla extract and stir.

While this mix cools, dissolve the gelatin in 1 cup
of VERY cold water. Let sit for several
minutes until the gelatin is spongy. You can actually start with this step on the second day, before working with the color jello, so that the gelatin gets the right texture while you work with the rest of the ingredients.

Once the milk/water mixture is lukewarm, add about 1 cup of the mixture to the dissolved
gelatin little by little. When the gelatin
mixture is homogeneous and at about the same temperature of the milk/water, add it to the remaining mixture and stir. This might sound a bit tedious and slow, but if you don't do it, you'll end up with lumps of gelatin all over the place - not nice.
Don't forget to keep stirring so that the gelatine stays liquid - at least you can say you're multitasking (upper body resistance and cooking; just change hands every now and then). When the mixture is practically cooled down, pour slowly on top of the jell-o color cubes. Don't let the mixture get cold; otherwise the gelatin will set before you can pour it; it has to be cold enough so that the color jello is not dissolved by the mixture.

Don't forget to keep stirring so that the gelatine stays liquid - at least you can say you're multitasking (upper body resistance and cooking; just change hands every now and then). When the mixture is practically cooled down, pour slowly on top of the jell-o color cubes. Don't let the mixture get cold; otherwise the gelatin will set before you can pour it; it has to be cold enough so that the color jello is not dissolved by the mixture.

Refrigerate until firm.
FUZZY IDEAS:
- Be creative!! Use cookie cutters for different shapes or use the color of jello that agrees with the event. Now that Christmas is near, I can picture the color jello in the shape of stars, boots and trees. Also, a cherry/lime jello would look really cute at the table.
- Use a bundt pan or another similar baking pan (like the ones used for cakes). The ones with non-stick surfaces work better, but you can also spray the inside of the pan with vegetable oil; just remember to wipe it down and leave very little oil on so that it doesn't mix with the jello. The different shapes look gorgeous.
- Use food coloring in the milk mixture to get a different look. How about some drops of red for a pink jello?
- Use different extracts in the milk mixture, like coconut, almond or hazelnut. Mom's favorite is lime jello in coconut-flavored milk jello.
- Use the unsweetened or light versions to make a dessert for those who need to watch their diet.
- Prepare individual servings (using plastic cups or punch cups) – good for parties and you don't have to worry about the serving. Besides, it's like having a bunch of little mosaiques at your party, so it can even become a centerpiece!!
- Kids
like playing with the colors and the shapes; ask for their suggestions or recruit them for the
stirringfun. - Before the color jello sets completely, add chopped fruit or berries. You might even try to end up with one berry in each square... Why not?
- Make the
stirringwork out easier by having a lot of iced water in a large bowl. Put the pot (or whatever you used) on top of it to cool it down faster - just be very careful because you could end up with some of the milk jello setting before you can think of it! - If you like extra firm jello, reduce the amount of water, but the color jello should always be firmer than the milk jello.

Well, that's it! Hope you try it - you won't regret it. If you do, don't forget to share your experience or even your photos... Just click on "Join this Site" in the right margin, and you'll be able to start sharing!
Do you have a different recipe or any more yummy ideas? Just jot a comment and let's see what others have to say. Who knows! maybe we can end up with a cooking club :)
Enjoy and stay blessed!
Yiya
Post-post: Mosaic Jello - Take 2!
I prepared a mosaic jello for a sweet neighbor; this version has four colors and looks so beautiful! Would you like to come over and see the new version?

Yomi!!!!! =)
ReplyDeleteEstuvo BIEN buena! :)
ReplyDelete